To integrate with the Mobile Money widget there are two requirements.
Include the following script tag in your
<head>tag in your root html document which is usually named index.html.Sandbox:
<script src="https://widget.northeurope.cloudapp.azure.com:9443/v0.1.0/mobile-money-widget-mtn.js"></script>
Widget Demo:
https://widget.northeurope.cloudapp.azure.com:9443/demo.html; Production:
<script src="TODO_REPLACE_WITH_PRODUCTION_PATH"></script>2.Add one or several elements with one of the following CSS classes: mobile-money-qr-payment.
NOTE: An element can only contain ONE of the CSS classes.
<div class="mobile-money-qr-payment"></div>QR Payment
To use the QR payment widget you should use the mobile-money-qr-payment CSS class on your element. The initial size of the widget will be 36x45 pixels, when expanded the widget will grow to 200x400 pixels.
Example:<div class="mobile-money-qr-payment"></div>
The QR payment widget requires four different attributes on your element. The attributes are the following:
data-api-user-iddata-amountdata-currencydata-external-id
If any of the above attributes is missing there will be an error thrown in your browser. The following requirements for each attribute are:
data-api-user-id
Your unique identifier (UUID) for the API user created in the Partner GUI. The value should be in the RFC 4122 version 4 format.
Example:
<div...data-api-user-id="b12d7b22-3057-4c8e-ad50-63904171d18c"...></div>
data-amount
The amount to be charged. The amount can be any positive number up to four decimals (e.g. 100.9998).
Example:
<div ...data-amount="100"...></div>
data-currency
The currency of the payment. The currency should be in the ISO-4217 format (e.g. EUR).
Example:<div ...data-currency="EUR"... ></div>
data-external-id
Your identifer for the payment.
Example:
<div...data-external-id="144-123-323"...></div>
A valid QR payment widget looks like the following example.
Example:
<div
class="mobile-money-qr-payment"
data-api-user-id="b12d7b22-3057-4c8e-ad50-63904171d18c"
data-amount="100"
data-currency="EUR"
data-external-id="144-123-323" >
</div>
What we described so far is the simplest form of the QR payment widget. When using the simplest form there is no integration towards your system. To see a status of a payment you will need to login into the Partner GUI.
The QR payment has more features and these are explained in the sections below.
Updating attributes
Updating the attributes of an element can be done in several ways and below is one example of how this could be done in plain JavaScript.
Add a unique identifer to your element.
Example:
<div id="my-unique-identifer"class="mobile-money-qr-payment"data-api-user-id="b12d7b22-3057-4c8e-ad50-63904171d18c"data-amount="100.98"data-currency="EUR"data-external-id="144-123-323"></div>
2.Fetch the element with the help of document.getElementById(id);.
Example:
var element = document.getElementById("my-unique-identifer");3.Set the attribute with the help of element.setAttribute(name, value);.
Example:
element.setAttribute("data-amount", 200.98);
4.Done, your element should now have a new value for the specifed attribute!
Valid JavaScript code looks like the following example.
Example:
// find the elementvar element = document.getElementById("my-unique-identifer");//set the attributeelement.setAttribute("data-amount", 200.98);
References
Events
The following section assumes you know the basics of web development (HTML and JavaScript). We will describe which events are sent, when they are sent and what data they return.
The QR payment widget has four events:
mobile-money-qr-payment-createdmobile-money-qr-payment-canceledmobile-money-qr-payment-successfulmobile-money-qr-payment-failed
The events are sent when the widget detects a state change of an invoice.
Event detail
The event that is sent contains an invoice which can be accesed by event.detail.
Example:
{
      "invoiceId": "a427024deb60474c",
      "externalId": "144-123-323",
      "referenceId": "4943bb77-7417-4aec-8293-1c99796d4872",
      "paymentReference": "08694e5c",
      "payee": {
           "partyIdType": "PARTY_CODE",
           "partyId": "b12d7b22-3057-4c8e-ad50-63904171d18c"
      },
    "payeeFirstName": "Tillman",
    "payeeLastName": "Inc.",
    "amount": 100,
    "currency": "EUR",
    "status": "SUCCESSFUL", // PENDING, SUCCESSFUL or FAILED
    "expiryDateTime": "2018-06-03T04:15:49.795Z"
}
For further information about the invoice fields see Partner Gateway API.
To listen to an event just add an event listener to either a parent of the widget or the widget itself. See example below.
Example:
window.addEventListener("mobile-money-qr-payment-created", function (event) { console.log("Invoice:", event.detail); });Example:
var element = document.getElementById("my-unique-identifer"); element.addEventListener("mobile-money-qr-payment-created", function (event) { console.log("Invoice:", event.detail); });
References
EventTarget.addEventListener
mobile-money-qr-payment-createdThe mobile-money-qr-payment-created event is sent when an invoice is created. Emits the created invoice.
mobile-money-qr-payment-canceledThe mobile-money-qr-payment-canceled event is sent when an invoice is canceled by the user. Emits the canceled invoice.
mobile-money-qr-payment-successfulThe mobile-money-qr-payment-completed event is sent when an invoice is successful. Emits the successful invoice.
mobile-money-qr-payment-failedThe mobile-money-qr-payment-failed event is sent when there are any errors. Emits no invoice.
Screenshots
Payment button
Default state of the widget.

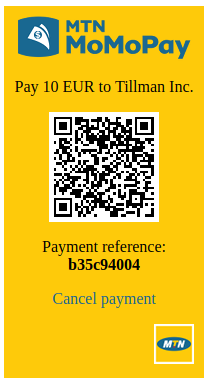
Confirm view
Shown when the button has been clicked. The event mobile-money-qr-payment-created is sent.

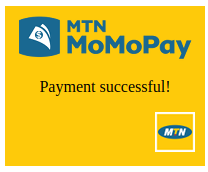
Successful view
Shown when the invoice has been successful. The event mobile-money-qr-payment-successful is sent.

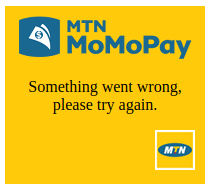
Failed view
Shown when problems are detected, e.g. network errors and Partner Gateway errors. The event mobile-money-qr-payment-failed is sent.

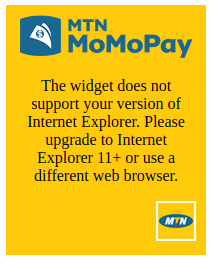
Unsupported browser view
Shown if the user is using a lower version than Internet Explorer 11.

Initializing dynamically added widgets
The widgets are initializated during the DOMContentLoaded event. If any widget is added to the DOM tree during runtime these need to be initialized. To initialize new widgets the following method should be called:
mobileMoneyReinitializeWidgets();Browser support
The widget aims to support evergreen browsers (browsers that are automatically upgraded to future versions) and Internet Explorer 11.
Testing in sandbox environment
When using the sandbox script the widget is running towards a test backend. Depending on what amount the invoice has the backend will respond with different statuses.
1 - 19 PENDING
20 - 79 FAILED
all other amounts SUCCESSFUL
In the sandbox environment the attribute data-api-user-id can be an arbitrary UUID.
Example below will show the pending state:
<div class="mobile-money-qr-payment"data-api-user-id="b12d7b22-3057-4c8e-ad50-63904171d18c"data-amount="10" data-currency="EUR"data-external-id="Receipt-2112"></div>